
Travel
How to prepare for a bicycle trip

If you think that traveling is all about getting on a plane or train, going to a city, taking pictures of the sights, and coming back, we can assure you that everything is much more exciting. Tourism involves different ways of entertaining the pastime. For example, hiking on foot on a pre-laid trail, rafting in a river by kayak or traveling by bicycle.
Bicycle travel is becoming more and more popular among today’s adventurers. There are many reasons for going on a trip on an iron horse. Someone wants to test themselves and test their endurance. Someone interested in exploring the area. Others seek to diversify hiking, increase distance and speed.
Cycling is good freedom of choice. The route can be changed on the fly if you want. In a pinch you can take public transport.
Traveling by bicycle is the best choice for a vacation. It is a good combination of recreation and sports. In addition, such a trip is not harmful to the environment.
Let’s figure out how to organize a bike trip on your own, how to plan a route and what to take with you? Web site
Destination Determination
If you organize a bicycle tour yourself, start by planning the route. There are three options:
- Use a ready-made itinerary.
- Choose a direction and decide what you want to see on the way.
- Combine the two: take a ready-made itinerary and supplement it.
After defining a route and marking it on Google Maps, measure the length with a ruler. Add 20% to the resulting length, as Google Maps does not take into account the peculiarities of the terrain.
Split a route into days. For beginner cyclists, it is recommended to use no more than 60 km per day, and even less on the first and last day.
Take your planning seriously, because the first route affects whether you like cycling or not.
Do not strive to ride as many kilometers as possible, try to enjoy the adventure. Increase the distance gradually – despite the distance, pedaling will become easier and easier each day.
When planning your route, use the distance you are able to cover in a day as a guide. To gauge your ability, spend a day on your bike. Ride out of town at a comfortable pace. Evaluate the level of fatigue during the ride and the next day. After such a training session, you can objectively assess your strength and plan daily distances for future travel.
Types of bicycle travel
Trips over long distances are divided into these types:
- autonomous;
- semi-autonomous;
- non-autonomous.
Autonomous
Autonomous bicycle travel involves detachment from civilization and infrastructure. These are cycling trips for experienced cyclists who know how to find water, organize a place to sleep and quickly cope with any problems. For autonomy, it is important to have a variety of equipment and be able to properly place it on the bike. Such hikes are long – from 500 km.
Semi-autonomous
Travelers sleep in tents, every day they travel many kilometers, but on the way there are villages and towns where they buy something they need. On such a trip you will need less equipment. The trip is not very expensive, because they cook food on their own, and spend the night in tents. The length of the trip is not very long. For such journeys are suitable countries in Europe.
Non-autonomous
Non-autonomous traveling is the most comfortable and suitable for beginners. They imply movement in the daytime and overnight stays in cities. You do not need a lot of equipment for such a trip. It is important to take care that you can find a place to sleep overnight, and take enough money with you. A good destination is Europe, because the infrastructure there is well developed.
Choosing a bike
A bicycle breakdown can ruin the experience of your tour. Before you travel, go to a repair shop to have your bike serviced. Do this even if you think your bike is in good condition.
For long rides, you need a universal hybrid or cross bike. It successfully combines the qualities of a road bike and a mountain bike. Some bicycle travelers go on bike trips on a road bike and even on a city bike.
It is desirable that the device meets these requirements:
- A chromium-molybdenum or titanium frame. On the road you will have to spend a lot of time in the saddle, a long ride on these frames is not as tiring as on a rigid aluminum. And carbon frames are expensive, and it is not recommended to load them.
- The handlebars should allow a variety of hand positions. Low landing – not the best choice, will quickly get tired hands.
- For a long trip you need a luggage carrier. It is important that it can support the weight of the backpack. Trunk that is attached just under the saddle is a bad choice, there should be three points of support.
- A fork with a locking function. On asphalt this will add speed, and when climbing an elevation you don’t have to expend your strength to sway. Spring-elastomer forks are virtually maintenance-free, so they are suitable for hiking.
- Wheels should be sturdy. Do not put racing tires, they are easily damaged. Optimal level hubs are Shimano Deore LX to Deore XT. Rims choose a stronger than average level. In addition, the key to reliability – quality spokes. They will provide the necessary strength and stiffness wheel.
- Disc brakes have advantages in terms of efficiency. But the big disadvantage is that with them you can not install a rack. Repairability of disc brakes with a hydraulic drive is lower than with a mechanical one. Rim brakes are better not to use when traveling on muddy terrain, dirt will be hammered into the design and block the wheel.
- Transmission equipment choose not the entry level. But a high level is also unlikely to be needed. The optimal level of drive – Shimano Alivio Deore LX.
- Pedals are better to have a contact. On long rides, they not only reduce the likelihood of feet slipping, but also increase the efficiency of pedaling. It will be important to buy universal cycling shoes. As a last resort, buy pedals with tuklips, although they are not as comfortable, but fit any shoe.
When buying a new bike is not possible, upgrade your existing bike. For example, if the trip is planned on good roads, and you have a mountain model, then change the tires from dirt to narrower. If the trip will be over mountainous terrain, and the bike has a small gear range, then change the cassette to one with a larger range of star sizes. This way you will significantly reduce your power consumption on climbs. Replacing the brake pads and adjusting the derailleur is a matter of five minutes, but the effect is noticeable immediately. These upgrades do not need a large monetary investment, but will make the trip easier and more pleasant.
What you need to take with you on a bike trip
If you are going on a bike trip for the first time, you will be surprised by the number of things: goggles, reflectors, bags, flashlights, flasks, but let’s talk about everything in order.
On the trip you will need:
- Documents and money.
- Phone, charger, and Power Bank.
- Sunglasses and cream.
- A set of dishes (cup, plate) and utensils (spoon, fork).
- Hygiene products in the smallest containers.
- First aid kit.
- Insect repellents.
- Garbage bags.
- Flask for water.
Bicycle kit:
- Camera repair kit and spare tubes.
- Hexes.
- Cable with lock.
- Pump.
- Replacement tires.
- Bicycle lights and reflectors.
- Multi-tools.
- Fitting blades.
- Chain lubricant, chain lubricant tools and spare chain.
- Spoke wrench.
Outfit
Of travel gear it makes sense to take these things:
- Tent.
- A sleeping bag.
- Rolling blanket.
- Inflatable pillow.
- A gas burner and lighter.
- Matches.
- Chainsaw and axe.
- Kettle and ladle.
- Scissors.
- Rope.
Clothes
Choose your clothing seriously. On the trip should be provided: ventilation, moisture removal, protection from the cold. The best choice is a cycling outfit. If you do not see the point in buying cycling gear for infrequent trips, then take similar items for hiking.
- Raincoat.
- Windbreaker.
- Thermal underwear.
- Warm socks.
- Shoes with hard soles.
- Cycling gloves.
- Swimsuit.
- Helmet.
- Bicycle shorts with a special insert.
Nutrition
Nutrition can be compared to filling up your car. A lot of calories are burned while driving and it is important to replenish in time.
For breakfast, eat slow carbohydrates, such as porridge. Add stew, cheese, nuts or honey to the porridge. After eating, give your body time to digest and hit the road in half an hour. Make breakfast your densest meal.
Snack on fast carbs every 10-15 km. A banana, dried fruit or an energy bar will do.
Do not overeat at lunch in order not to overload the stomach and not to suffer from sleepiness. Immediately after meals do not rush on the road, let the food assimilate.
For dinner, eat protein with carbohydrates, such as cottage cheese with fruit, meat with vegetables, porridge with canned fish.
The cyclist should drink water often and a little at a time. It is necessary to drink even when you do not feel like it. Take a couple of sips every 5 km.
Listen to your body, it will tell you what you need.
Safety precautions
Cycling is not only very interesting, but also traumatic. To all be well, follow these rules:
- Check the technical condition of the bike before the ride.
- Choose the right clothes for cycling. First, it should be bright and with reflective inserts, and secondly, it should fit your body well so as not to get anywhere and not get caught.
- Be sure to use a helmet.
- Your bike should have a light on it so that you can see well at night.
- Don’t forget to take a first aid kit from home.
An extra recommendation would be getting emergency preparedness training, like first aid courses Newmarket, just in case something happens during your bicycle trip.
Conclusion
Biking is an exciting way to explore the world and yourself. The pros of such travels are many:
- Inexpensive. It’s a budget-friendly way to get from one place to another.
- Safe. The risk of getting into an accident on an auto is much higher than on a bike.
- Healthy. Cycling is a way to lose weight, strengthen muscles and increase endurance.
- Adventure. When traveling by bicycle, it is not clear where you will get to, where you will spend the night, etc.
Do not be afraid of cycling and have fun during the ride!
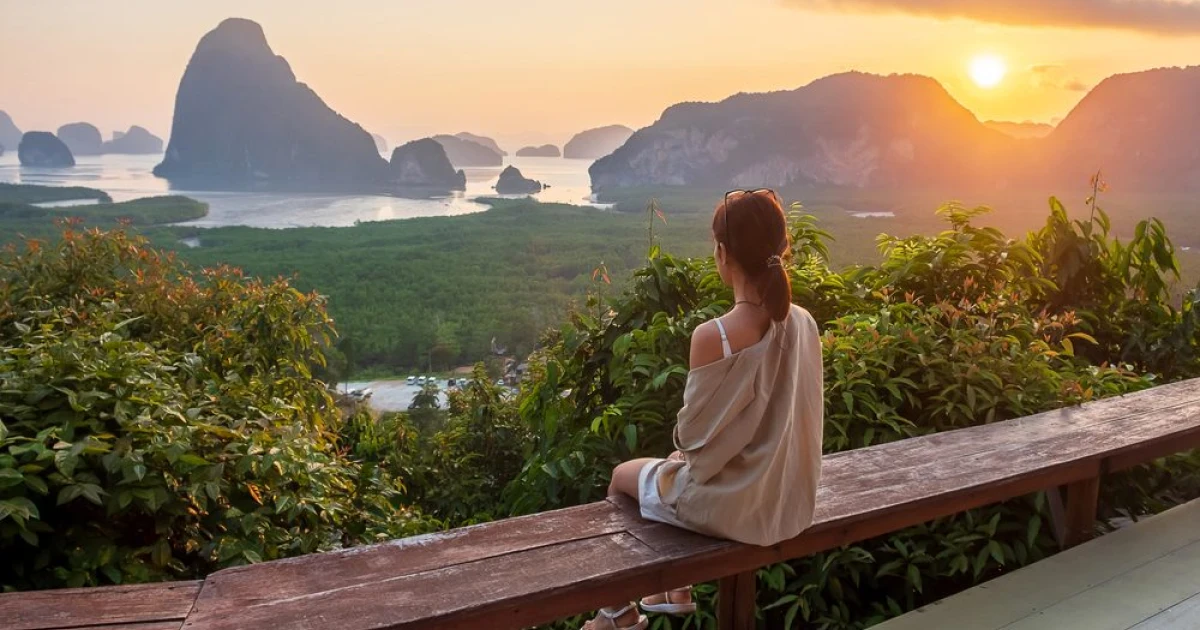
Travel to Phuket needs to look for comfortable resorts to stay in. Most travelers look for all-inclusive resorts to check the prices.
Find affordable resorts
You can stay in one of the two beachfront upscale resorts on:
- Karon Beach
- Kamala beach
These are the most renowned beaches. Both beaches suit for:
- families
- honeymooners
The family friendly beachfront resorts are perfect for family bondings. The resort has:
- swimming pools
- giant water park
These are where everyone can enjoy. The resort is perfect for those who love nature, with the botanical gardens. You will be refreshed by the fresh air in the resort. It is a perfect spot to release a tired body from work. It is not true that Phuket resorts are expensive. In fact, they are one of the most affordable tourist destinations in Asia.
You can stay in the Beach Village Resort and relax in a spa. These are best for couples, being in a private beach location. You can locate the place through:
- 10-minute drive from Patong
- 5-minute drive from Kamala Beach
Relaxing tropical stay experiences
Many travelers choose to visit Phuket because of the tropical experience. More relaxing beaches are on their beautiful spots while enjoying a spa retreat. You can relax while surfing at Kata Beach. It is the sweet spot in Phuket, where plenty of restaurants and activities are accessible. It maintains the easy-going charm of the place.
Kata has two adjacent beaches, namely:
- Kata Yai
- Kata Noi
Beaches have soft white sand and clear water. This is really picturesque. The bay is calm and great for snorkeling during high season.
Kata’s waves are attracting surfers in the low season. It gives a surf-town vibe with laid-back beach bars and board rental shops. Kata has a friendly international feel. Here is what you found along the streets:
- local Thai eateries
- reggae bars
- Italian bistros
- sushi joints
- tailors
- massage shops
- minimarts
You will enjoy all these from an all-inclusive report package.
Activities included
The nightlife in Kata is more about:
- chilling at the beachside restaurant
- drinking a cocktail at mellow bars
The scene is less rowdy. It is more sophisticated than Patong.
Families love Kata because of its safe swimming. Couples appreciate the romantic sunset view of the beach. More dining options are available. Peak months are busy, yet Kata rarely feels overwhelmed. It retains a cozy village atmosphere.
FAQs
Who is best for Kata travel in Phuket?
Families and couples are the best travelers to visit Kata. It has a balanced beach holiday. Kids and adults can enjoy it. There are activities and dining places where you can stop to try their local foods.
Which of the two popular beaches is more appreciated?
Parents appreciate the kid-friendly nature of Kata Yai and the mid-range resorts with family amenities. Couples choose Kata Noi for a quieter, idyllic escape.
When do surfers visit Kata?
Surfers visit Kata from June to September. These months are the best season for surfers.
When to go for a bigger night out?
Head to Patong if you crave a bigger nightlife experience. Patong is a 15 minutes drive to Kata.
Is Phuket town’s cultural charm included in the package?
Almost all inclusive resort packages include visiting cultural charms. You will be discovering the local life in Phuket. Phuket’s capital city is away from the beaches. Yet it offers a completely different vibe. Travelers visit Phuket Old Town. The town is the cultural and food hub in the island.
Are there all inclusive luxury resorts accessible in Phuket?
Phuket Town’s accommodations have charming hotels. They have affordable guesthouses too. Some luxury hotels are:
- SINAE Phuket Luxury Hotel
- The Memory at On On Hotel
- Casa Blanca Boutique Hotel
- Courtyard by Marriott Phuket Tow

Hit the open road with confidence and joy — whether it’s a weekend escape or an extended cross-country journey. A road trip is more than just moving from point A to point B; it’s about stories, memories, and the unexpected moments you’ll cherish forever. From careful planning to smart gear choices, here are ten tips to make your next road trip smooth, fun, and unforgettable.
1. Start With a Flexible Plan
Before you set off, outline a general route and list must-see stops. Use travel apps, GPS, or even good old-fashioned paper maps for backup. But don’t schedule everything too rigidly — part of the magic of a road trip is discovering places you didn’t know about beforehand. Stay open to detours and spontaneous adventures.
2. Choose the Right Company
Traveling with the right people can make or break your journey. Make sure everyone has a clear idea of what they want from the trip, from activities to daily pace, and be ready to compromise when needed. Great communication is key.
3. Check Your Vehicle
Whether you’re using your own car or a rental, give it a thorough once-over before departure. Inspect tires, oil, brakes, lights, and make sure your insurance covers roadside assistance. A little prep goes a long way in avoiding avoidable breakdowns.
4. Mind Your Driving Pace
Long hours behind the wheel can lead to fatigue. Break up long stretches with regular stops — grab dinner, see a landmark, or simply stretch your legs. Pacing yourself keeps you alert and energized for more of the fun parts of the journey.
5. Fuel and Budget Smartly
Plan fuel stops where prices are reasonable and your tank isn’t running low. Filling up in smaller towns rather than highway service stations often saves money. Budgeting ahead helps keep unexpected costs from overshadowing the experience.
6. Pack Essentials (and Snacks!)
Bring snacks, water, and meals that are easy to eat on the road. Favorites like sandwiches, fruit, or homemade treats can boost morale and keep costs down. Don’t forget a reusable water bottle and healthy options for long drives.
7. Keep Your Valuables Safe
Make sure electronics, cameras, and personal items aren’t on display inside your car when parked. Keeping them in a backpack or tucked away reduces the risk of theft. Well-lit parking and guarded lots are always best.
8. Entertainment Matters
Good music, podcasts, audiobooks, or a shared playlist can turn hours on the road into a highlight of your trip. Prepare a variety of entertainment to suit everyone in the car — sometimes classic hits and regional tunes provide the best memories.
9. Bring the Right Tech
Modern road trippers depend on devices for navigation, photography, weather updates, and communication. A portable power station is one of the smartest pieces of gear you can bring. Unlike simple phone chargers, a high-capacity power station keeps multiple devices charged, runs small appliances, and supports electronics when outlets are scarce — perfect for camping stops or remote locations.
10. Keep Your Camera Handy
Some of the most memorable moments happen when you least expect them. Keeping your camera or smartphone within easy reach means you’re always ready to capture those sweeping landscapes, roadside gems, or silly moments with your travel companions.
Conclusion
A well-planned road trip mixes preparation with spontaneity. From thoughtful stops to packing smart essentials like snacks, maps, and tech gear, you’re setting yourself up for an adventure worth remembering. If you want to take your travels to the next level, gear up with reliable power solutions — and that starts with excellent picks from ALLPOWERS.
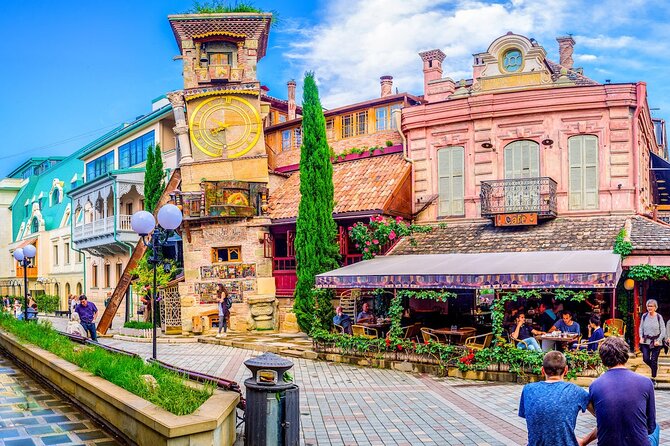
Tbilisi, the heart of Georgia, offers a rich blend of history, culture, and stunning landscapes. While the city is walkable, renting a car provides the best way to explore its many attractions and surrounding areas at your own pace. In this guide, we’ll show you how to navigate Tbilisi’s must-see sights while offering advice from marketing communications expert Nodar Darsavelidze on the best routes and parking tips for car renters.
1. Begin Your Adventure at Freedom Square
Start your journey at Freedom Square, the bustling center of Tbilisi. It’s a great spot to get your bearings and take in the city’s energy. Nearby attractions like Rustaveli Avenue and the Georgian National Museum are within walking distance, and parking is generally available at various public parking lots nearby.
- Must-see spots around Freedom Square:
- Rustaveli Theatre – A cultural gem.
- Tbilisi Opera House – If you’re a fan of classical music and performances.
Expert Tip from Nodar Darsavelidze:
“Freedom Square is the ideal starting point. After you park your car, you can easily walk to several iconic spots. However, if you prefer a quicker start, use the parking facilities around Rustaveli Avenue, where you can also find easy access to cafes and shopping.”
2. Head to the Historic Old Town (Altstadt)
Tbilisi’s Old Town is a maze of narrow streets and beautiful architecture, best explored by foot. However, renting a car gives you flexibility to travel from one side of the Old Town to the other, allowing you to discover hidden gems.
- Main attractions in the Old Town:
- Narikala Fortress – Take your car to the base and either walk up or use the cable car to reach the top for panoramic views.
- Abanotubani (Sulfur Baths) – One of the oldest parts of Tbilisi, famous for its traditional sulfur baths.
- Sioni Cathedral – A historic church that’s a must-see for any visitor to Tbilisi.
Parking in the Old Town can be tricky, so it’s best to park at one of the public lots near Rike Park and walk the short distance to the historic sites.
3. Mtatsminda Park for the Best Views of Tbilisi
After soaking in the historic center, take a short drive up to Mtatsminda Park for a breathtaking view of Tbilisi. Located on a hilltop, it provides the best panoramic views of the entire city, especially at sunset.
- What to do at Mtatsminda Park:
- Enjoy the funicular ride to the top for a smooth journey up.
- Take a stroll through the park or dine in one of the many restaurants with stunning views.
Expert Tip from Nodar Darsavelidze:
“Driving up to Mtatsminda is a fantastic option, as it allows you to enjoy the hilltop views without the hassle of public transport. Just keep in mind that the roads can be narrow, so drive cautiously, especially in busy times.”
4. Explore the Tranquil Vake Park
If you’re in the mood for some greenery and relaxation, Vake Park is a peaceful retreat in the heart of Tbilisi. It’s perfect for a relaxing afternoon after visiting the city’s lively centers.
- What to do in Vake Park:
- Take a leisurely walk or rent a bike.
- Visit the nearby Tbilisi Zoo or enjoy a peaceful picnic by the lake.
Parking in the Vake area is relatively easy, with several designated parking spots near the park entrances.
5. Hidden Gems: Wine Regions and Beyond
If you’re looking to venture a little further out, Tbilisi is surrounded by beautiful regions like Kakheti, known for its wine-making, and Jvari Monastery, offering incredible views of the city. A rental car makes it easy to explore these places without relying on group tours.
- Nearby attractions to consider:
- Kakheti Wine Region – Explore vineyards and taste local wines.
- Jvari Monastery – A short drive from the city offering panoramic views of the river.
These destinations are perfect day trips, and a rental car allows you to explore them on your schedule.
6. Parking Tips for Tbilisi Drivers
Parking in Tbilisi can be a bit challenging in busy areas like Rustaveli Avenue or the Old Town, but with a bit of planning, you can easily find spots.
- Public Parking Lots: Major public parking lots are located near popular sites, such as Rike Park, Freedom Square, and Vake Park. Parking fees are reasonable, especially if you opt for hourly rates.
- Parking Apps: Use apps like Parkopedia to find available parking spaces in the city.
Expert Tip from Nodar Darsavelidze:
“In Tbilisi, parking apps are a great way to avoid wasting time looking for a spot. If you’re visiting popular sites, like the Old Town, try parking in central lots like those near Rike Park and then walk or use public transport to reach the attractions.”
Renting a car in Tbilisi allows you to experience the city’s blend of history, culture, and nature with ease. From the vibrant streets of Old Town to the tranquil views from Mtatsminda, having a car gives you the freedom to explore on your terms.

Why Cattle Waterers Are Essential for Modern Livestock Operations

NCC Verona Lago di Garda – Private Transfers Between Verona and Lake Garda

Why Crash Games Like Aviator Are Becoming An Integral Part Of Online Game Offerings

Small Crypto Exchanges Worth Looking At (Ausfinex, MEXC, Bitrue)

Why Timber Bridge Building Remains a Popular Choice for Modern Infrastructure
Why Timber Bridge Building Remains a Popular Choice for Modern Infrastructure
Small Crypto Exchanges Worth Looking At (Ausfinex, MEXC, Bitrue)
Why Crash Games Like Aviator Are Becoming An Integral Part Of Online Game Offerings
NCC Verona Lago di Garda – Private Transfers Between Verona and Lake Garda