
Tech
11 Ways to Fix We couldn’t complete the updates, undoing changes in Windows 10

How to solve the error message “ We couldn’t complete the updates, undoing changes – don’t turn off your computer ” on Windows 10? If you are experiencing this problem then you have come to the right site because this article will help you to get out of the problem.
Well, this Windows 10 is the latest edition of the Operating System made by Microsoft and like all other OS Windows 10 also definitely has a lot of problems. But what I’m focusing on here is when downloading a new update ( update ) and restarting the PC, the update process just crashes and Windows can’t start and what appears is an error message, read more.
And it turned out that we were just stuck in the message then I tried to wait until it was finished but in the end it didn’t work, it just restarted by itself. In addition to the error above after the restart process is complete, you may start seeing some progress messages like this:
“Installing Updates 15% We couldn’t complete the updates, Undoing changes, Don’t turn off your – computer Restarting” and I have good news that the process goes up again to 30% and the bad news is the computer restarts again and this will continue to occur if you do not make changes to your PC.
Cause of error We couldn’t complete the update, undoing changes
- Windows Update can’t download smoothly. If the updates that Windows installed don’t download properly, this could cause an error to appear.
- Insufficient hard disk space. In some cases, if you don’t have enough space for updates on your system volume, the problem could also be because of that.
- The update was interrupted during installation. If the update is interrupted during the installation process like PC shuts down, etc. Errors can be caused by it.
- System files are corrupted. Another factor causing this problem to appear is your corrupted system files.
- There are applications, drivers etc that are not compatible with your PC. If indeed you have recently installed additional applications then it is highly recommended to delete them.
How to solve the error message We couldn’t complete the updates, undoing changes
Run CMD (Command Prompt) in Administrator mode.
Now type the following code then hit enter for each line of code:
- net stop wuauserv
2. net stop bits
3. net stop cryptSvc
4. net stop msiserver
Then open file explorer then delete all files and folders in C:WindowsSoftwareDistribution .
Now open CMD again and still in admin mode then type the following code and hit enter:
- net start wuauserv
2. net start cryptSvc
3. net start bits
4. net start msiserver
Restart your PC to save the rules.
Try to reinstall Windows updates and this time it should work.
If you’re afraid you’re having the same or another problem, you can create a restore point before you download Windows updates.
Download Windows Update Troubleshooter
- Please download Windows Update Troubleshooter .
- Once the file is successfully downloaded, double click on the file to run it.
- Select Windows Update and click Next .
- Follow the instructions given.
- If a problem is found, please click ” Apply this fix “.
- Please to install Windows updates again.
Run the Readiness App
- Press the Windows icon + R , then type services.msc .
- Many services will appear in a new window, please look for a service called App Readiness and then double click it.
- Change the Startup Type to Automatic and click Start .
- Click Apply and then click OK .
- Restart your PC and the problem should be resolved.
Disable Automatic Updates
- Please press Windows + R again and type services.msc .
- Now locate the service named Windows Updates and double click on the service it.
- Change the Startup Type to Disabled then click Stop .
- Click Apply then OK .
- Restart the PC and try to reinstall Windows updates.
Increase Partition Size for System
Note: If you are using Drive Encryption like Bit Locker then you will need to remove it.
- You can increase the partition size manually or using the EaseUS application .
- Press Windows + R and type diskmgmt.msc .
- Now to increase the size of the Partition you must at least have one empty partition first.
- To create it, right-click on the partition to be freed and then click Shrink Volume .
- After that, right-click on the partition that was successfully shrink and then click Extend Volume .
- Restart the PC and the error message should no longer appear.
Use Alternative Method
If the five methods above still don’t solve your problem, maybe you can use the alternative methods below:
- First, you can download CC Cleaner for and run a scan to fix registry problems.
- Second, create a new admin account and you can run updates using that account.
- Third, if you know which update is causing the problem then you can download it manually and try to install the update. The update file can be seen here: https://catalog.update.microsoft.com/ .
- Fourth, remove any kind of VPN installation on your PC.
- Fifth, try to turn off antivirus and turn off Windows Firewall.
- Sixth, try to refresh the PC and the system will automatically fix the problem if detected.
Note: The method below is a way for those of you who cannot enter the Windows menu and if you can enter the Windows menu then you must try the method described above.
Use System Restore
- You must have a cassette / Flashdisk containing a bootable Windows 10.
- Restart your Windows 10.
- During the restart process, please enter the BIOS and on the boot menu select USB or DVD/CD according to the bootable you entered, whether flash or cassette.
- Restart your PC.
- If bootable is detected, Windows setup will appear then click Repair your computer .
- After that on the Choose an option menu , select Troubleshoot .
- After entering the Troubleshoot menu, select Advanced Options .
- Then, on the Advanced options menu click System Restore .
- Select the restore point that was created before the Windows update.
- When Windows restarts you won’t get any more error messages.
- If this method works then you should keep trying method no 1 above.
Delete Problematic File Updates
- Do the same thing as number 7 above until you enter the Windows setup menu.
- Still the same, please click Repair your computer .
- Go to the Troubleshoot → Advanced Options → Command Prompt menu .
- Type the following code and hit enter at each line of code:
- cd C:Windows
2. del C:WindowsSoftwareDistribution*.* /s /q
- Close the command prompt and restart your PC.
- You will be able to enter the Windows menu.
- If the error message sometimes still appears then you should try methods 1-6 above.
Run SFC and DISM
- Still run the command prompt in the manner described above.
- Type sfc /scannow in cmd and press enter.
- Wait until the scanning process is complete usually takes 5-15 minutes.
- If so then type the following code and press enter on each line of code:
- Dism /Online /Cleanup-Image /CheckHealth
2. Dism /Online /Cleanup-Image /ScanHealth
3. Dism /online /Cleanup-Image /startcomponentcleanup
4. Dism /Online /Cleanup-Image /RestoreHealth
- Attention: the above process is not a fast process, this process can take up to 2 hours or even 5 hours according to your computer specifications.
- After the Dism process is run, then you repeat again method no 2 in this section.
- Restart the PC and the problem will be resolved.
Turn off Secure Boot
- Restart your PC.
- When the computer starts up, please enter the BIOS menu.
- Find the Secure Boot setting and change it to disabled , usually Secure Boot is on the Security tab, Authentication Tab, or Boot Tab.
- Caution: After disabling Secure Boot, it may be difficult to re-enable Secure Boot unless you have to factory reset your PC.
- Restart your PC and the error should no longer appear.
- If successful, please re-enable secure boot earlier.
Remove System Reserved Partition
Open CMD like method no 8 above and enter the following code:
- bcdboot C:Windows /s C:
2. diskpart
3. list vol
4. select vol (Select System Volume)
5. act
6. list vol
7. select vol (Select System Reserved Volume)
8. inactive
9. exit
You can see the system volume and system reserved volume in the info and label section of cmd.
Configure BCD with the following code:
- bcdedit /set {bootmgr} device partition=C:
2. bcdedit /set {default} device partition=C:
3. bcdedit /set {default} osdevice partition=C:
Before making changes or rebooting , make sure you have Windows installation DVD or WinPE/WinRE Cd or USB flash Drive in case of Windows Boot failure. If Windows won’t boot, use the Windows installation disc to boot which can be seen here: How to Make a WinPE Bootable USB .
After that, at the command prompt type the following code:
- bootrec /fixmbr
2. bootrec /fixboot
3. bootrec /rebuildbcd
After the reboot process , move WinRE from the system reserved partition to the system partition .
Now reopen the command prompt and type the code below and change the drive letter according to your partition letter which can be seen on diskpart.
- diskpart
2. list vol
3. select vol <Recovery Volume>
4. assign let=R
5. Disable WinRE:
6. reagentc /disable
- Remove WinRE from the reserved partition with the code rd R:Recovery .
- Copy WinRE to the system partition with the code robocopy C:WindowsSystem32Recovery R:RecoveryWindowsRE WinRE.wim /copyall /dcopy:t .
- Configure WinRE : reagentc /setreimage /path C:RecoveryWindowsRE .
- Finally enable WinRE : reagentc /enable .
- For future use, create a new partition at the end of the drive (after the OS partition) and save the WinRE and OSI (Original System Installation) folder containing all the files contained in the Windows 10 DVD. Make sure you have enough free space on your hard disk to create this partition drive (usually 100GB). If you choose to create this partition, it is important that you set the partition ID flag to 27 (0x27) using Diskpart, which determines that it is the Recovery partition.
The final word
If nothing else works then Restore your PC to an earlier time ( restore point ), remove the problematic update from Control Panel, disable automatic updates and use your PC normally until Microsoft attempts to fix this update issue. In a few days, maybe 20-30 days, try to install the update again, if it still fails, please try the above method again. As for if you don’t want Windows updates and want Windows to return to normal then the most effective solution is to reinstall.
That’s about How to Overcome We couldn’t complete the updates, undoing changes in Windows 10, please ask if there are other problems in the comments section. Thank you..
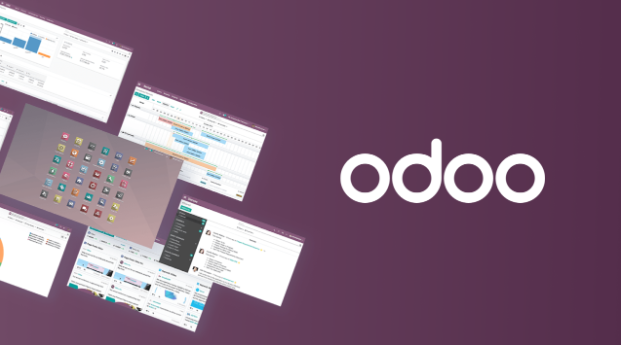
In recent years, AI has moved from a “nice-to-have” feature to a core driver of digital transformation. From automated customer service to predictive analytics, AI is reshaping how businesses operate at every level. At the same time, enterprise resource planning (ERP) systems are no longer just back-office tools. They are becoming intelligent platforms that actively support decision-making. This shift is particularly visible in platforms like Odoo, which is increasingly integrating AI capabilities into its ecosystem. As organizations adopt an AI-first mindset, the role of ERP is also being redefined.
So how exactly is Odoo evolving in this new landscape, and what does it mean for businesses?
From system of record to system of intelligence
Traditionally, ERP systems were designed as systems of record. Their main purpose was to centralize data across departments, including finance, sales, and operations. While this brought efficiency, decision-making still relied heavily on human interpretation.
Today, AI is changing that dynamic. With the integration of machine learning models and automation tools, ERP systems like Odoo are gradually transforming into “systems of intelligence.” Instead of simply storing data, they can now:
- Help to predict demand based on historical patterns
- Recommend next-best actions in sales pipelines
- Automate repetitive workflows such as invoice processing
- Help identify potential anomalies in financial transactions
This evolution enables businesses to move from reactive operations to proactive decision-making, a key characteristic of AI-first organizations.
Where AI is showing up in Odoo
Although Odoo is not an AI-native platform in the same way as some modern SaaS tools, it is steadily incorporating AI-driven features and enabling integrations with external AI services. Some of the most notable applications include:
- Intelligent automation: Routine tasks such as data entry, invoice matching, and email responses can now be partially automated using AI. This reduces manual workload and minimizes human error. For example, AI-powered OCR (Optical Character Recognition) can extract data from invoices and automatically populate accounting modules.
- Predictive analytics: AI models can be applied within Odoo environments. In Odoo, this can be applied to: Sales forecasting, inventory planning, and cash flow prediction. These insights help businesses make more informed decisions, especially in volatile markets.
- AI-enhanced customer interactions: With chatbot integrations and AI-driven CRM tools, businesses can improve customer engagement. Odoo’s CRM module can be extended with AI to prioritize leads, suggest responses, and even predict conversion likelihood.
- Smart recommendations: AI can suggest optimal pricing strategies, product bundles, or inventory restocking plans. This is particularly useful for eCommerce and retail businesses using Odoo.
The reality: AI in ERP still requires customization
Despite these advancements, it is important to recognize that AI in ERP is not entirely plug-and-play. Out-of-the-box Odoo implementations typically cover standard business processes. However, AI use cases often depend on specific business contexts, data quality, and operational goals. This means companies usually need to:
- Customize workflows
- Integrate third-party AI services
- Train models on their own data
- Ensure data consistency across modules
According to PowerGate Software, one of the biggest challenges is not the technology itself, but aligning AI capabilities with real business needs. “Many companies expect AI to deliver immediate results,” a representative from PowerGate Software notes. “In reality, the success of AI in ERP systems like Odoo depends heavily on how well the system is customized and how clean the underlying data is.”
AI-first ERP: A shift in implementation strategy
The rise of AI is also changing how ERP systems are implemented. Instead of deploying a fully fixed system, many organizations are now adopting a more flexible approach:
- Start with a core Odoo implementation
- Identify high-impact areas for AI (e.g., sales, operations)
- Gradually introduce AI-driven features
- Continuously refine based on real usage data
This iterative model aligns well with modern product development practices and reduces the risk of large-scale ERP failures. PowerGate Software has observed that businesses adopting this phased approach tend to achieve better outcomes. By combining ERP implementation with AI-driven enhancements, companies can balance stability with innovation.
Looking ahead: The future of Odoo in an AI-Driven World
As AI technologies continue to mature, the role of ERP systems will expand even further. In the case of Odoo, we can expect:
- Deeper native AI integrations
- More seamless connections with external AI platforms
- Improved user experiences through intelligent interfaces
- Greater automation across end-to-end business processes
However, technology alone is not enough. Businesses will need the right strategy, data infrastructure, and implementation partners to fully realize these benefits.
The convergence of AI and ERP is not just a technological trend. It represents a fundamental shift in how businesses operate and compete. Platforms like Odoo are evolving to support this shift, but their true potential can only be unlocked through thoughtful customization and strategic implementation. For companies looking to move toward an AI-first model, the question is no longer whether to adopt AI in ERP, but how to do it effectively.
Based on implementation experience from companies like PowerGate Software, we suggest that the future of ERP lies in this balance: leveraging the flexibility of platforms like Odoo while embedding intelligence through AI to create smarter, more adaptive business systems.
About PowerGate Software – AI-powered software product studio
- Website: https://powergatesoftware.com/
- Odoo development service: https://powergatesoftware.com/with-technologies/odoo-development/
- Email: [email protected]

Diesel engines have long been valued for their durability, torque, and fuel efficiency, but many owners eventually wonder about unlocking additional performance from their vehicles. Whether you’re looking to improve towing capacity, enhance acceleration, or simply experience what your diesel engine can truly deliver, understanding your options is the first step.
The good news is that diesel engines are particularly responsive to performance modifications due to their robust construction and the way they generate power. This article explores the various approaches to increasing horsepower in diesel engines, from simple bolt-on upgrades to more comprehensive modifications that work together to transform your vehicle’s capabilities.
Cold Air Intake Systems
Replacing the factory air intake system with a cold air intake allows your engine to breathe more efficiently by drawing in cooler, denser air. Cooler air contains more oxygen molecules per volume, which supports more complete fuel combustion in the cylinders.
Most diesel engines are restricted by their stock intake systems, which prioritize noise reduction and cost over maximum airflow. Installing an aftermarket cold air intake typically involves removing restrictive airboxes and routing intake piping to draw air from outside the engine bay where temperatures are lower.
Performance Exhaust Systems
The exhaust system plays a crucial role in how efficiently your diesel engine expels combustion gases and makes room for fresh air intake. Stock exhaust systems often feature smaller diameter piping and multiple sound-dampening components that create backpressure.
Reducing this backpressure through larger diameter pipes and high-flow mufflers allows exhaust gases to exit more quickly. When exhaust gases leave the cylinders faster, the engine can complete its combustion cycle more efficiently and produce additional power.
Electronic Tuning and ECM Programming
Modern diesel engines are controlled by sophisticated computer systems that manage fuel delivery, injection timing, and boost pressure among other parameters. The factory programming in these engine control modules is typically conservative to accommodate various fuel qualities, climates, and driving conditions.
Performance tuning adjusts these parameters to optimize power output while maintaining reliability within safe operating ranges. Reprogramming can yield substantial horsepower gains because diesel engines respond particularly well to increased fuel delivery when paired with adequate air supply.
Diesel Turbo Chargers
Turbo charger installation or upgrading represents one of the most effective methods for increasing diesel engine horsepower significantly. Moreover, diesel turbo chargers utilise gases from the exhaust to spin a turbine that, through the compression of incoming air, will force more oxygen into the combustion chambers than natural aspiration allows.
Many diesel engines come with factory turbochargers that can be replaced with larger or more efficient units designed for higher boost pressures. Professional installation services are available through diesel performance shops, specialized truck service centers, and some general automotive performance facilities that have technicians trained in forced induction systems.
Fuel System Upgrades
The fuel delivery system must keep pace with increased air supply when pursuing higher horsepower levels in diesel engines. Upgrading fuel injectors to units with higher flow rates ensures adequate fuel reaches the cylinders when you’ve added other performance modifications.
High-performance fuel pumps may also be necessary to maintain proper fuel pressure throughout the RPM range. These components work together to support complete combustion when your engine is moving significantly more air than stock configuration.
Intercooler Enhancement
When air is compressed by a turbocharger, it heats up substantially, which reduces its density and oxygen content. An intercooler cools this compressed air before it enters the engine, restoring density and providing more oxygen for combustion.
Upgrading to a larger or more efficient intercooler than the factory unit allows for lower intake air temperatures even under sustained high-boost conditions. Cooler intake temperatures also reduce the risk of engine knock and allow for more aggressive tuning parameters.
Injection Timing Adjustments
The precise moment when fuel is injected into the combustion chamber significantly affects how efficiently that fuel burns and how much power it produces. Advancing injection timing causes fuel to ignite earlier in the compression stroke, which can increase cylinder pressure and power output.
However, timing adjustments must be carefully calibrated because excessive advancement can cause rough running, increased engine noise, and higher combustion temperatures. Electronic control systems on modern diesels allow for precise timing adjustments through programming rather than mechanical modifications.
Supporting Modifications for Reliability
Increasing horsepower places additional stress on various engine components that may need reinforcement to maintain long-term reliability. Upgraded head studs or bolts help secure the cylinder head against higher combustion pressures from performance modifications.
Transmission upgrades often become necessary because factory transmissions may not be rated for the increased torque that diesel performance modifications produce. Enhanced cooling systems including larger radiators and auxiliary transmission coolers help manage the additional heat generated by higher power output.
Maintenance Considerations with Performance Upgrades
Engines producing significantly more power than stock require more attentive maintenance schedules to ensure longevity and continued performance. Oil changes may need to occur more frequently because higher boost pressures and combustion temperatures place greater demands on engine oil.
Monitoring boost levels, exhaust gas temperatures, and other vital parameters through aftermarket gauges helps you understand how modifications affect engine operation. Regular inspections of turbocharger components, intercooler connections, and fuel system elements catch potential issues before they result in failures or performance degradation.
Boost diesel engine horsepower by improving airflow (intake/exhaust), optimizing fuel delivery, and adding forced induction. Successful enhancement requires complementary modifications aligned with specific goals (towing, acceleration, responsiveness). Research, professional consultation, and proper maintenance ensure increased power while preserving reliability.
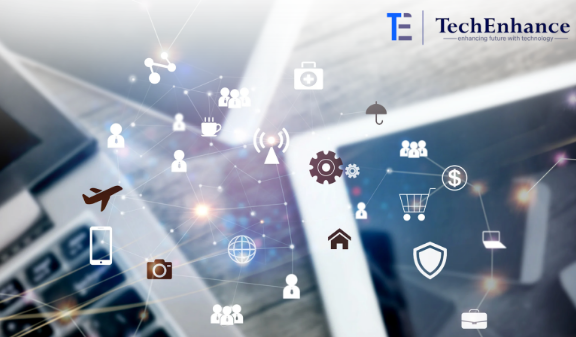
In a rapidly evolving digital world, businesses are under constant pressure to innovate, optimise, and future-proof their operations. Whether it’s adopting emerging technologies, strengthening IT infrastructure, or building customer-centric digital experiences, companies need more than just tools – they need a technology partner capable of driving sustainable success. This is where Techenhance emerges as a trusted and forward-thinking powerhouse in the global tech landscape.
As organisations accelerate their digital transformation journeys, Techenhance provides the expertise, frameworks, and strategic guidance required to navigate this complex terrain. Their ability to combine cutting-edge technology with a consultative approach makes them a preferred choice for businesses across industries.
What Makes Techenhance a Standout Digital Partner?
At its core, Techenhance is designed to elevate businesses by enhancing their technological capabilities. Rather than simply delivering solutions, they architect scalable digital ecosystems that evolve as the business grows. Their approach focuses on agility, efficiency, and long-term value — three essentials for modern enterprises.
With a robust portfolio of services and a team of seasoned technology consultants, Techenhance offers end-to-end digital transformation support that covers everything from ideation to execution and ongoing optimisation.
1. Comprehensive Digital Transformation Services
Digital transformation is more than adopting new technology — it’s about reshaping business processes, elevating experiences, and unlocking new opportunities. Techenhance helps companies redesign their operations using modern digital strategies that align with market shifts and customer expectations.
Their transformation services span across:
- Business process optimisation
- Enterprise automation
- Cloud and infrastructure modernisation
- Technology roadmap creation
- Data-driven decision frameworks
- Application modernisation and migration
This holistic approach ensures that every aspect of a business’s digital ecosystem works together to drive growth.
2. Expertise Across Modern Technologies
One of the biggest strengths of Techenhance lies in its technically diverse team. The company keeps pace with evolving technology trends, ensuring clients are never left behind. They deliver solutions across a wide spectrum of modern technologies including:
- Artificial Intelligence and Machine Learning
- Cloud computing
- DevOps and automation
- Data science and analytics
- IoT (Internet of Things)
- Full-stack application development
- Cybersecurity and compliance solutions
This broad expertise empowers businesses to adopt the right tools for their specific challenges, enabling smarter operations and improved scalability.
3. Custom Software and Product Development
In today’s competitive environment, cookie-cutter solutions are no longer enough. Businesses require highly tailored digital products that address unique operational needs and customer journeys.
Techenhance specialises in developing customised software solutions that integrate seamlessly with existing business workflows. Their product development lifecycle emphasises innovation, usability, and performance. From concept creation to product deployment and maintenance, every stage is handled with meticulous attention to quality and user experience.
4. A Customer-Centric Approach
Technology alone is not enough — understanding the client’s business landscape is equally vital. Techenhance excels in combining technical knowledge with a deep understanding of industry-specific needs.
They follow a consultative model that includes:
- Detailed need analysis
- Business use-case mapping
- ROI-driven planning
- Transparent communication
- Continuous improvement cycles
This ensures that solutions are not only technically strong but also aligned with strategic business goals.
Whether it’s a startup aiming to build its first product or an enterprise seeking to modernise legacy systems, Techenhance adapts its approach to deliver maximum value.
5. Delivering End-to-End IT Management
Many organisations struggle with maintaining secure, scalable, and efficient IT operations. Techenhance offers complete IT management and support services that ensure seamless day-to-day functioning.
Their IT services include:
- Infrastructure monitoring
- Network management
- Security and compliance
- Cloud optimisation
- Disaster recovery setup
- 24/7 IT support services
This allows businesses to focus on core objectives while relying on Techenhance to maintain operational stability.
6. Industry-Focused Technology Solutions
Digital transformation isn’t one-size-fits-all. Different industries have unique challenges, regulatory requirements, and technological needs. Techenhance’s industry-specific expertise helps companies implement customised digital solutions that fit their sector.
They work across sectors such as:
- Financial services
- Healthcare
- Retail and eCommerce
- Logistics and transportation
- Real estate
- Manufacturing
- Education and e-learning
By aligning technology with industry demands, Techenhance ensures faster adoption, reduced risk, and greater long-term impact.
7. Building Scalable Digital Experiences
Modern customers value seamless, intuitive digital interactions. Techenhance helps businesses create customer-centric experiences across mobile apps, websites, and digital platforms.
Their experience design services include:
- UX/UI design
- Customer journey optimisation
- Prototyping and testing
- Performance and usability enhancement
With user experience becoming a key differentiator, Techenhance’s strategic design capabilities help businesses stand out in a crowded marketplace.
8. Strong Focus on Innovation and Future-Readiness
The digital world changes fast — and businesses must innovate to stay relevant. Techenhance invests heavily in emerging technologies and research to ensure clients are always one step ahead.
They help organisations integrate:
- Predictive analytics
- Automation tools
- Machine learning algorithms
- Cloud-native architectures
- Modern development lifecycles
- Real-time monitoring dashboards
By future-proofing operations, Techenhance enables businesses to pivot quickly as market demands shift.
9. Why Businesses Trust Techenhance
Companies partnering with Techenhance benefit from:
Proven technical expertise
Their experienced team delivers reliable, high-performance digital solutions.
Tailored strategies
Solutions are designed based on business goals, not generic templates.
Transparent processes
Clients enjoy full visibility at every project stage.
Commitment to long-term value
Support extends beyond deployment, ensuring ongoing optimisation.
Competitive advantage
By leveraging advanced technologies, businesses gain an edge in their industry.
From startups to established enterprises, Techenhance empowers organisations to unlock new digital opportunities and scale confidently.
Final Thoughts
Digital transformation is no longer optional — it’s a strategic necessity. As technology becomes the backbone of modern business, companies must adopt innovative, scalable solutions to stay competitive. Techenhance stands out as a reliable partner that brings together expertise, innovation, and customer-centricity to deliver exceptional digital outcomes.
Whether you’re aiming to build a new product, modernise existing technology, strengthen your IT infrastructure, or adopt advanced digital tools, Techenhance provides the end-to-end support needed to succeed.
For businesses planning their next phase of digital evolution, partnering with a trusted technology expert like Techenhance can make all the difference.

A Practical Look at 11 Commercial Building Safety and Structural Upgrades

11 Home Maintenance Services Every Homeowner Should Know About

Why Liability Insurance Is Essential for Every Contractor

Why Cattle Waterers Are Essential for Modern Livestock Operations

NCC Verona Lago di Garda – Private Transfers Between Verona and Lake Garda
Why Cattle Waterers Are Essential for Modern Livestock Operations
Why Liability Insurance Is Essential for Every Contractor
A Practical Look at 11 Commercial Building Safety and Structural Upgrades